

This tutorial is just for informational purposes only, it isnt necessary to properly use your Quadrino. I get many of questions on soldering so I thought I would post what I use.
The Right Tool for the Job
Some "pros" will probably argue with me here but I use this $12 iron from radio shack the most because it is so much smaller than my digital controlled irons and so it’s easier to use for surface mount devices (SMD). I don’t know why they don’t make the computer controlled ones smaller now-a-days when most electronic parts have shrunk considerably. I have two digital irons and they are both cumbersome to handle. This small one get's my hand closer to the job and reduces hand jitter. I just wish they made it even smaller!
Watch the youtube video links at the bottom of the page!
Got Flux?
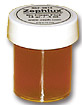 For most people that are coming here...I bet if you just got some good quality flux your soldering would improve a lot. Most of you probably never used flux during soldering before. I know I get a lot of Quadrino's back for warranty service with user-soldered pins that clearly didnt use flux. Flux is one thing I dont go cheap on, the radio shack stuff just doesnt cut it. I use expensive flux from Zephyrtronics part# NCF-0014. It’s like honey in color and the way it flows. Any flux is better than no flux, but this stuff is worth it if you do any significant amount of soldering.
 I use a syringe and needle tip like below for dispensing. The ChipQuick flux below would be a good quality flux as well. Using the syringe really pinpoints where I want the flux and this means so much less of a mess. If you have used flux before and gave up, it is probably due to how messy and sticky the stuff is. Let's face it, dealing with the cleaning of this stuff is a major pain.
No flux just makes soldering hard, the solder sticks to everything but the joint. Your joints are going to ball up or have whiskers portruding out where you removed the iron. Fluxless joints are not as strong, the solder doesnt properly bond with the PCB metal or the pin. This is due to oxidation that has built up on the PCB metal and possibly the pin metal. I won't go into detail here as this information is covered in detail on the internet. The point is simple, solder behaves very differently with flux and is much easier to use and less likely to cause solder bridges, weak joints and PCB damage due to over-heating and frustration.
Good thin solder wire is nice too but here almost any small electronics solder will do. You will probably find a Sn37Pb63 leaded solder, but you can also find many lead-free solders now. Also keep your solder fresh, buy it in small batches. If it gets too old then it starts making black guck everywhere that’s tough to clean and destroys iron tips.
Flux Cleaners
 I use one of two things to clean flux of boards depending on the amount of flux needing cleanup. For small cleanup or when cleaning the PCB part footprint prior to soldering I use a q-tip and some 99% anhydrous alcohol.
 This stuff is somewhat controlled but you can find a small bottle of it at the drugstore though you may need to special order the 99% stuff. I've had them start asking questions after I requested quarts of the stuff. I was using it as general cleaner for workshop tools, machines and PCBs so I was going through a lot quickly. A pump bottle shown at right is great for holding and dispensing small amounts of alcohol. Since alcohol evaporates so quickly you dont want to keep the cap off the bottle.
I've since moved to purpose flux cleaner that works better for PCB cleaning then alcohol which is the EC7m Natural Citrus Flux Remover. This stuff is great and I use a plastic bristle brush to work the cleaner into the tight areas. Use (ex. nitrile) protective gloves, the stuff starts to sting after a while.
Desoldering Braid
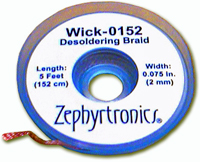 Desoldering braid is a handy thing to have for more reasons than to desolder a part. It can also be used to remove an excess amount of solder from a joint. Since solder braid is made from fine copper strands it is also susceptible to oxidation so putting some flux on the braid before using help greatly.
Solder braid can also be used in a neat trick for soldering Fine Pitch SMD chips like the Atmel MEGA 2560 with 144 pins spaced only 0.5mm apart. Soldering each pin would take too long. You can place a fine line of flux accross the PCB pads, place the Atmel chip in position. Solder a pin on opposite ends of the chip as a sort of tack weld to hold the chip in position. Then wet your iron tip with solder and run the tip down the pins. You'll create all sorts of solder bridges but you'll clear that up later. Just ensure each pin has it's share of solder. Now take the solder braid, apply some flux to the point you'll contact the board and pins with. Place the braid down on the pins and place the soldering iron over the braid to heat the braid. Now run the braid accross the pins. The braid will soak up the excess solder and leave just enough on the pins for a proper solder joint and a clean presentation. Now use a q-tip and 99% alcohol or proper flux remover to clean the work.
Hot Air Reflow
 This is not required for most hobbiests but it is a very useful tool for surface mount work. This tool pushes hot air on the rework spot to melt the solder. It can be used to easily remove large parts with many pins since all pins will get hot, melting the solder on each pin and the part can be removed with tweazers or an pneumatic suction pickup tool. I personally find this tool a must. I use it in combination with the soldering iron about 50/50 percent of the time. Still use flux when soldering and desoldering with this tool for the same reasons as before. Plus the flux conducts the heat which helps the process. I typically use an air temperature of 280 with a gentle air flow. The 280 degree temperature would mean around 200 at the board. The air flow must be just under the point where the air might blow the part off the board. I would move up to 315 degrees if I needed to reflow a usb connector that has more metal in it.
You can pick up a cheap chinese made hot air rework station for about $100 on ebay. Get one with dials, not digital up/down controls. The dials are much easier to use.
Good technique
Once you have the right tools, good technique and a lot of practice is the final hurdle. Use the wire pad often and tip cleaner sparingly to keep the tip of the iron clean. Add just a little solder to the iron tip before soldering the joint. Easy does it. Try to melt the solder into the joint by heating the joint rather than melting the solder into the iron, this ensures proper weldment to the joint as the pin and pcb pad were not cold during soldering. Keep the whole PCB assembly still while letting the solder cool. If the assembly jiggles while the solder is going to the solidus state then microfractures may be created. To clarify, motion while the solder is a liquid is fine, just when the soldering is complete do not bump the board or part being soldered. A soldered joint should be smooth and shiny, if not it may indicate lack of flux, microfractures in the join, a cold solder joint, or trapped bubbles....apply more flux, heat the join again and retry. Solder wants to stick to the hottest part so the joint must be hot enough to attract the solder from the iron.